Vegan Cashew Parmesan Cheese (Ready in 5 Minutes, No Cooking Required)
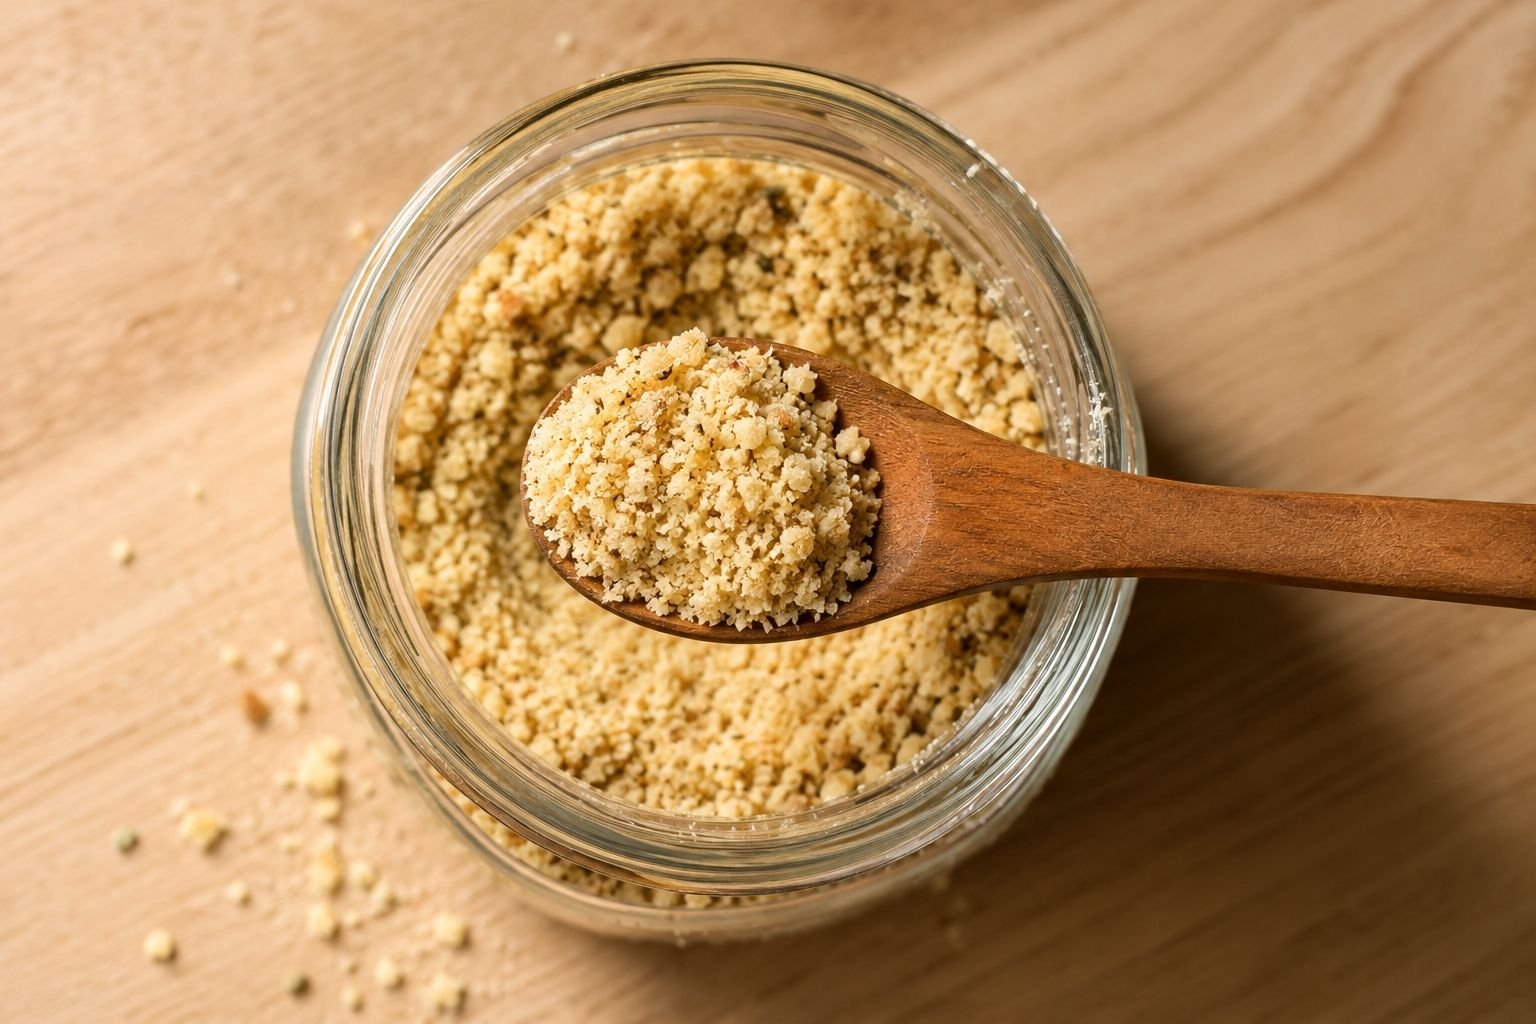
I used to buy the tub of vegan parmesan from the store, the shelf-stable kind that costs way more than it should and somehow still tastes like almost nothing. It wasn’t until a friend handed me a jar of her homemade version at a dinner party that I realized how much better this could actually be, and how ridiculously easy it was to make myself.
I went home that same night and made my first batch before I’d even properly unpacked from the party. That’s how convinced I was. It’s stayed in regular rotation in my kitchen ever since, and at this point I genuinely can’t remember the last time I bought the store-bought version.
This recipe uses four ingredients, a food processor, and about five minutes of actual effort. No baking, no straining, no waiting around. Just pulse and it’s done.
If you’ve made my vegan chili or my tofu tacos, this is the kind of topping that makes both of those even better. I genuinely keep a jar of this in my fridge at all times now, it’s become one of those staples I reach for without even thinking about it.
Why You’ll Love This
Four ingredients, five minutes. No cooking, no baking, no waiting. Just cashews, nutritional yeast, garlic, and salt in a food processor.
Tastes genuinely savory and cheesy. Nutritional yeast does the heavy lifting here, giving this a nutty, umami depth that gets surprisingly close to real parmesan.
Keeps for weeks. Stored properly, this lasts far longer than fresh dairy parmesan ever would.
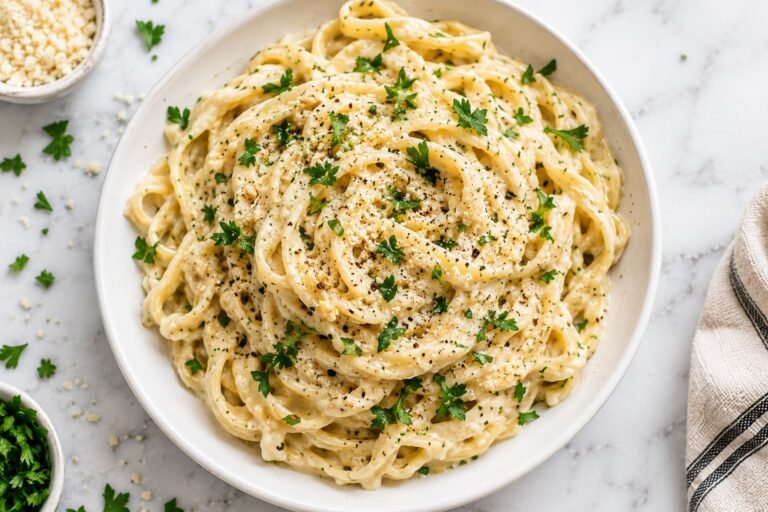
Endlessly versatile. Pasta, popcorn, roasted vegetables, salads, garlic bread, this goes on almost everything.
Recipe Ingredients
- 1 cup raw cashews
- 3 to 4 tablespoons nutritional yeast
- 1/2 teaspoon garlic powder
- 1/2 teaspoon salt, or to taste
If You Need to Substitute
No raw cashews? Raw sunflower seeds or blanched slivered almonds both work as a substitute, though the flavor will be slightly less rich and buttery than cashews give you.
Want it garlicky and bold? Increase the garlic powder to a full teaspoon, or add a small pinch of onion powder alongside it for extra depth.
Watching sodium? Start with a smaller amount of salt and adjust to taste after the first pulse, it’s much easier to add more than to fix an overly salty batch.
No nutritional yeast on hand? This one’s harder to substitute, nutritional yeast is really what gives this its signature savory, cheesy flavor. If you’re in a pinch, a small handful of finely ground toasted sesame seeds can add some umami depth, but the flavor will be noticeably different, not a true substitute.
Equipment You’ll Need
- A food processor or high-powered blender
- An airtight storage jar or container
- A rubber spatula for scraping down the sides
The Science Behind Why This Tastes Cheesy
Nutritional yeast is really the star of this recipe, and it’s worth understanding why it works the way it does.
It’s naturally rich in glutamates, the same compounds responsible for the savory, umami depth found in real parmesan, aged cheeses, and things like soy sauce or mushrooms. That’s what gives this mixture its salty, savory punch even though there’s no dairy involved at all.
The cashews contribute the fat and richness parmesan would normally bring, cashews are naturally high in fat compared to most other nuts and seeds, which is part of why they’re such a common base for vegan cheese recipes in general, not just this one. The garlic powder rounds out the savory profile without overpowering the nutritional yeast’s flavor.
Together, these three ingredients hit enough of the same flavor notes as real parmesan, salty, savory, a little nutty, that your brain reads it as “cheese-adjacent” even though the ingredient list looks nothing alike.
Choosing the Right Cashews
Raw, unsalted cashews are what you want here, and it does make a real difference.
Whole vs. pieces. Cashew pieces (often sold cheaper than whole cashews) work perfectly fine for this recipe, since everything gets pulsed down anyway. No reason to pay more for whole cashews if pieces are available.
Raw vs. roasted. Raw is best for a clean, controllable flavor. Roasted cashews will work in a pinch, but they shift the flavor toward something deeper and more toasted, and you’ll likely need to reduce the added salt since roasted cashews are sometimes lightly salted themselves.
Freshness matters. Cashews can go rancid faster than people expect, especially if they’ve been sitting in a pantry for a long time. If your batch tastes slightly off or bitter, stale cashews are the most likely culprit, not the recipe itself.
A Note on Nutritional Yeast
Not all nutritional yeast tastes the same. Brands vary more than you’d expect in how strong, cheesy, or savory their flavor is.
If your first batch tastes milder than you expected, it’s worth trying a different brand before assuming the recipe itself needs adjusting. Look for nutritional yeast labeled as flaked rather than powdered where possible, flakes tend to have a slightly more pronounced flavor and dissolve just as easily in the food processor.
Store your nutritional yeast in an airtight container away from heat and light. It keeps well for a long time, but its flavor can fade gradually if it’s left out or exposed to humidity.
Scaling This Recipe
The ratio here is simple and scales cleanly: for every 1 cup of cashews, use 3 to 4 tablespoons of nutritional yeast, 1/2 teaspoon garlic powder, and 1/2 teaspoon salt.
- Small batch: 1/2 cup cashews, 1.5-2 tbsp nutritional yeast, 1/4 tsp garlic powder, 1/4 tsp salt
- Double batch: 2 cups cashews, 6-8 tbsp nutritional yeast, 1 tsp garlic powder, 1 tsp salt
- Large batch (for gifting or big batches): 4 cups cashews, 12-16 tbsp nutritional yeast, 2 tsp garlic powder, 2 tsp salt
If you’re processing a large batch, do it in two rounds rather than overloading your food processor’s bowl. An overfilled bowl processes unevenly, leaving larger chunks near the top that never quite make it down to the blade.
How to Make It
Step 1: Add Everything to the Food Processor
Place the raw cashews, nutritional yeast, garlic powder, and salt into the bowl of a food processor.
Step 2: Pulse Until Crumbly
Pulse in short bursts, 5 to 10 pulses at a time, scraping down the sides of the bowl in between. You’re aiming for a texture similar to coarse breadcrumbs or grated parmesan, small crumbly pieces, not a fine paste.
Step 3: Check the Texture
Stop and check the consistency after every few pulses. It’s easy to go from “perfectly grated” to “cashew butter” in just a couple of extra pulses, so err on the side of pulsing less and checking often rather than running the processor continuously.
Step 4: Taste and Adjust
Give it a taste directly from the bowl. Add a bit more salt, garlic powder, or nutritional yeast depending on how bold you want the flavor, then pulse briefly again to combine.
Step 5: Store
Transfer to an airtight jar or container and store in the refrigerator until ready to use.
Tips
Don’t Skip the Scraping
Cashews tend to get pushed up the sides of the food processor bowl and stick there, away from the blade. Scraping down every few pulses keeps the texture even instead of leaving you with large unprocessed chunks at the bottom and overly fine dust near the blade.
Toast Your Cashews First for Extra Depth
While raw cashews work perfectly well here, lightly toasting them in a dry pan for a few minutes before processing (then letting them cool completely) adds a deeper, slightly roasted flavor that some people prefer over the plain raw version.
Use the Pulse Function, Not Continuous Blend
If your food processor has a separate pulse button, use it. Continuous blending is what most often turns this into a paste instead of a crumbly topping.
Variations to Try
Spicy version. Add a pinch of red pepper flakes or a small dash of cayenne for a subtle kick.
Herbed version. Pulse in a small amount of dried basil or oregano for an Italian-leaning flavor, especially nice over pasta.
Extra umami version. Add a small pinch of smoked paprika or a tiny splash of tamari before the final pulse for a deeper, more savory finish.
Nut-free version. Swap the cashews for raw sunflower seeds for a version safe for nut allergies, keeping everything else the same.
How I Store and Make This Ahead
This keeps well in the refrigerator in an airtight container for up to 3 weeks. I like making a double batch specifically because it holds so well, one jar for immediate use and one tucked in the back of the fridge for whenever the first one runs low.
It also freezes nicely. Portion it into a small freezer-safe container or bag and it’ll keep for up to 3 months, no real texture change once thawed since it’s already a dry, crumbly mixture rather than something with moisture to separate.
Dietary Adaptations
Nut-free: raw sunflower seeds substitute cleanly for the cashews, keeping everything else the same. The flavor is slightly less rich but still savory and satisfying.
Low sodium: start with 1/4 teaspoon salt instead of 1/2 teaspoon, then taste and adjust from there. It’s easy to add more, harder to fix an oversalted batch.
Garlic-free: simply omit the garlic powder. The nutritional yeast still carries most of the savory flavor on its own.
Soy-free and gluten-free: this recipe is naturally both, as written, with no substitutions needed.
Troubleshooting
It turned into a paste instead of staying crumbly. This means it was over-processed. Unfortunately there’s no way to reverse it once it happens, but a pasty batch still tastes great stirred into sauces or dressings instead of used as a dry topping.
It tastes bland. Usually a salt or nutritional yeast issue. Add a small amount of either, pulse briefly, and taste again before adding more.
It tastes bitter. This is most often a sign of rancid or old cashews. Fresh, properly stored cashews shouldn’t produce any bitterness.
It clumped together in storage. Moisture is the usual cause, either from a container that wasn’t fully airtight or from scooping it out with a wet spoon. Always use a dry spoon and make sure the lid seals tightly.
Mistakes I’ve Made So You Don’t Have To
Walking away mid-pulse to answer the door and coming back to cashew butter instead of parmesan. Pulse in short bursts and stay near the machine, this one goes from perfect to over-processed fast.
Forgetting to scrape down the sides and ending up with big unprocessed cashew chunks mixed in with fine crumbs. A few extra scrapes make a real difference in getting an even texture.
Using pre-salted, roasted cashews instead of raw ones once, thinking it wouldn’t matter much. The salt levels were completely thrown off and the flavor was noticeably different from my usual batch.
Storing a batch in a container that wasn’t fully airtight. It picked up moisture from the fridge and clumped together instead of staying loose and crumbly.
What to Serve It On
- Tossed over pasta with a drizzle of olive oil
- Sprinkled on roasted vegetables straight off the sheet pan
- Stirred into my vegan chili for extra savory depth
- Popped over warm popcorn as a savory snack topping
- Finished over a simple green salad in place of shredded cheese
More Recipes
- The Best Vegan Chili Recipe
- Tofu Tacos (Crispy Taco-Spiced Tofu Crumbles)
- Vegan Sushi Bake Recipe You’ll Want Every Week
- Vegan “KFC-Style” Fried Chicken (Copycat)
Frequently Asked Questions
Does this actually taste like parmesan? Not identical, but it hits a similar savory, salty, umami note thanks to the nutritional yeast, and it adds the same kind of finishing touch parmesan does to a dish.
Can I use roasted or salted cashews instead of raw? Raw is best for controlling the salt level and getting a cleaner flavor. Roasted or salted cashews will throw off the taste and texture.
Is nutritional yeast the same as regular yeast? No. Nutritional yeast is deactivated and has a completely different flavor and use, it won’t help anything rise and isn’t a baking ingredient.
How long does it last in the fridge? Up to about 3 weeks stored in an airtight container.
Can I make this oil-free? Yes, as written this recipe contains no oil at all, just cashews, nutritional yeast, garlic powder, and salt.
Vegan Cashew Parmesan Cheese
Ingredients
Equipment
Method
- Add cashews, nutritional yeast, garlic powder, and salt to a food processor.
- Pulse in short bursts, 5-10 pulses at a time, scraping down the sides between pulses.
- Check texture, aiming for a coarse, breadcrumb-like consistency, not a paste.
- Taste and adjust salt, garlic powder, or nutritional yeast as needed, then pulse briefly to combine.
- Transfer to an airtight jar and store in the refrigerator.
Notes
- Use raw, unsalted cashews for the most accurate flavor and texture.
- Pulse rather than continuously blend to avoid turning this into cashew butter.
- Toasting the cashews first (then cooling completely) adds a deeper, roasted flavor if desired.
- For nut-free: substitute raw sunflower seeds for the cashews.
- Keeps in the fridge up to 3 weeks, or freeze for up to 3 months.