
Halloween Peanut Butter Spider Cookies
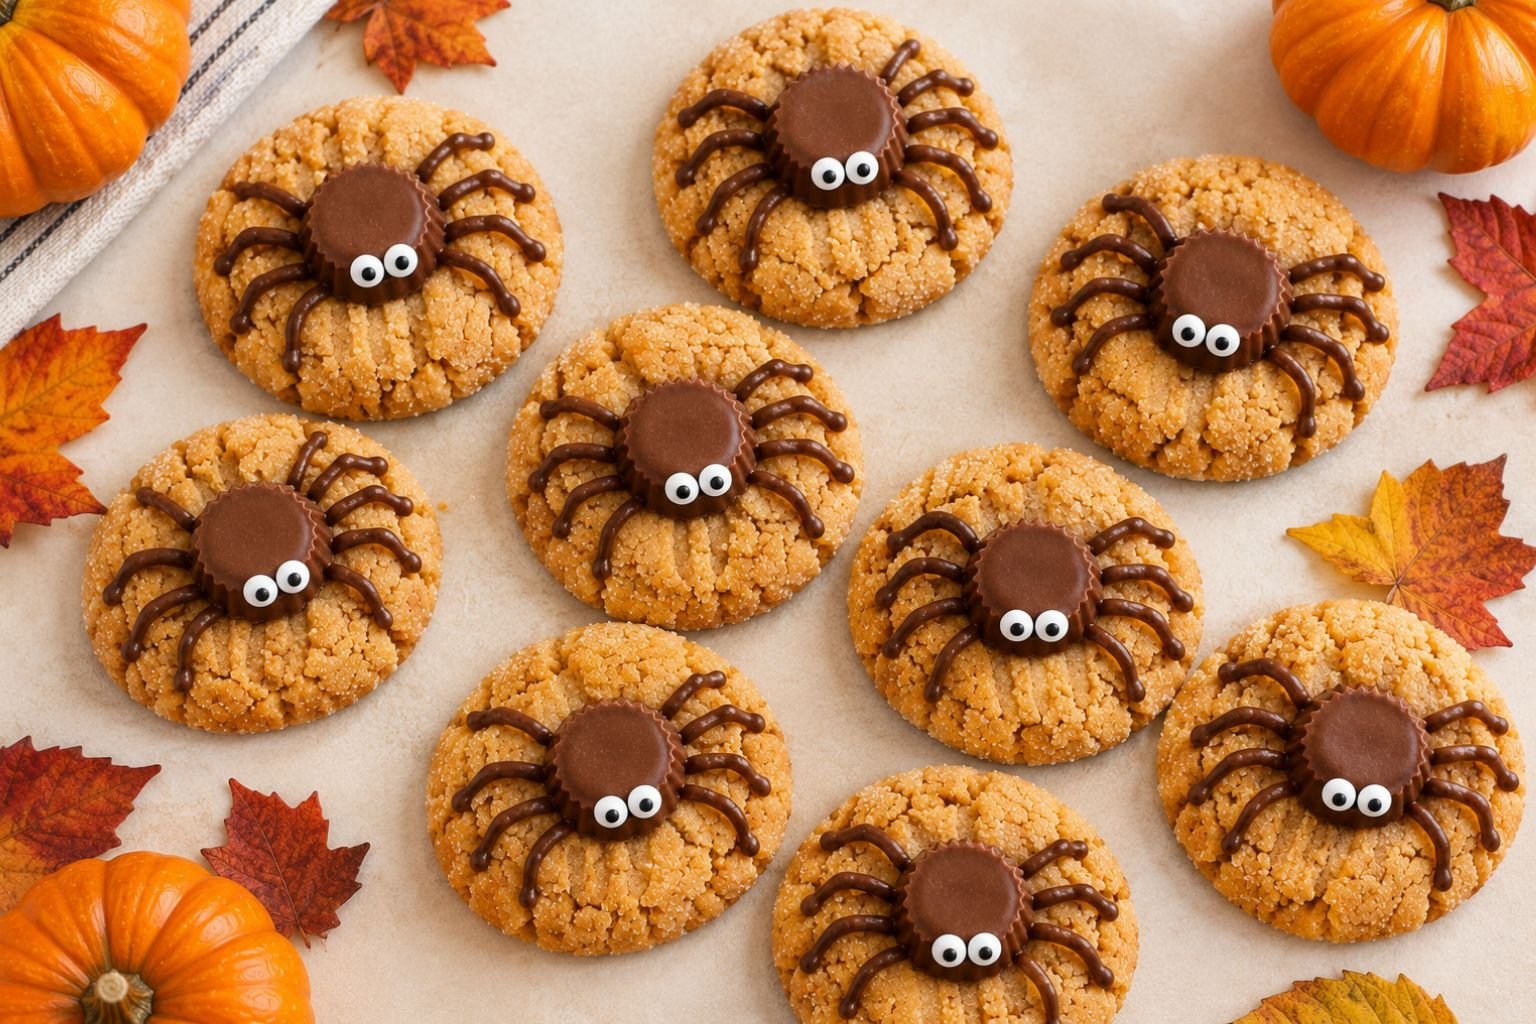
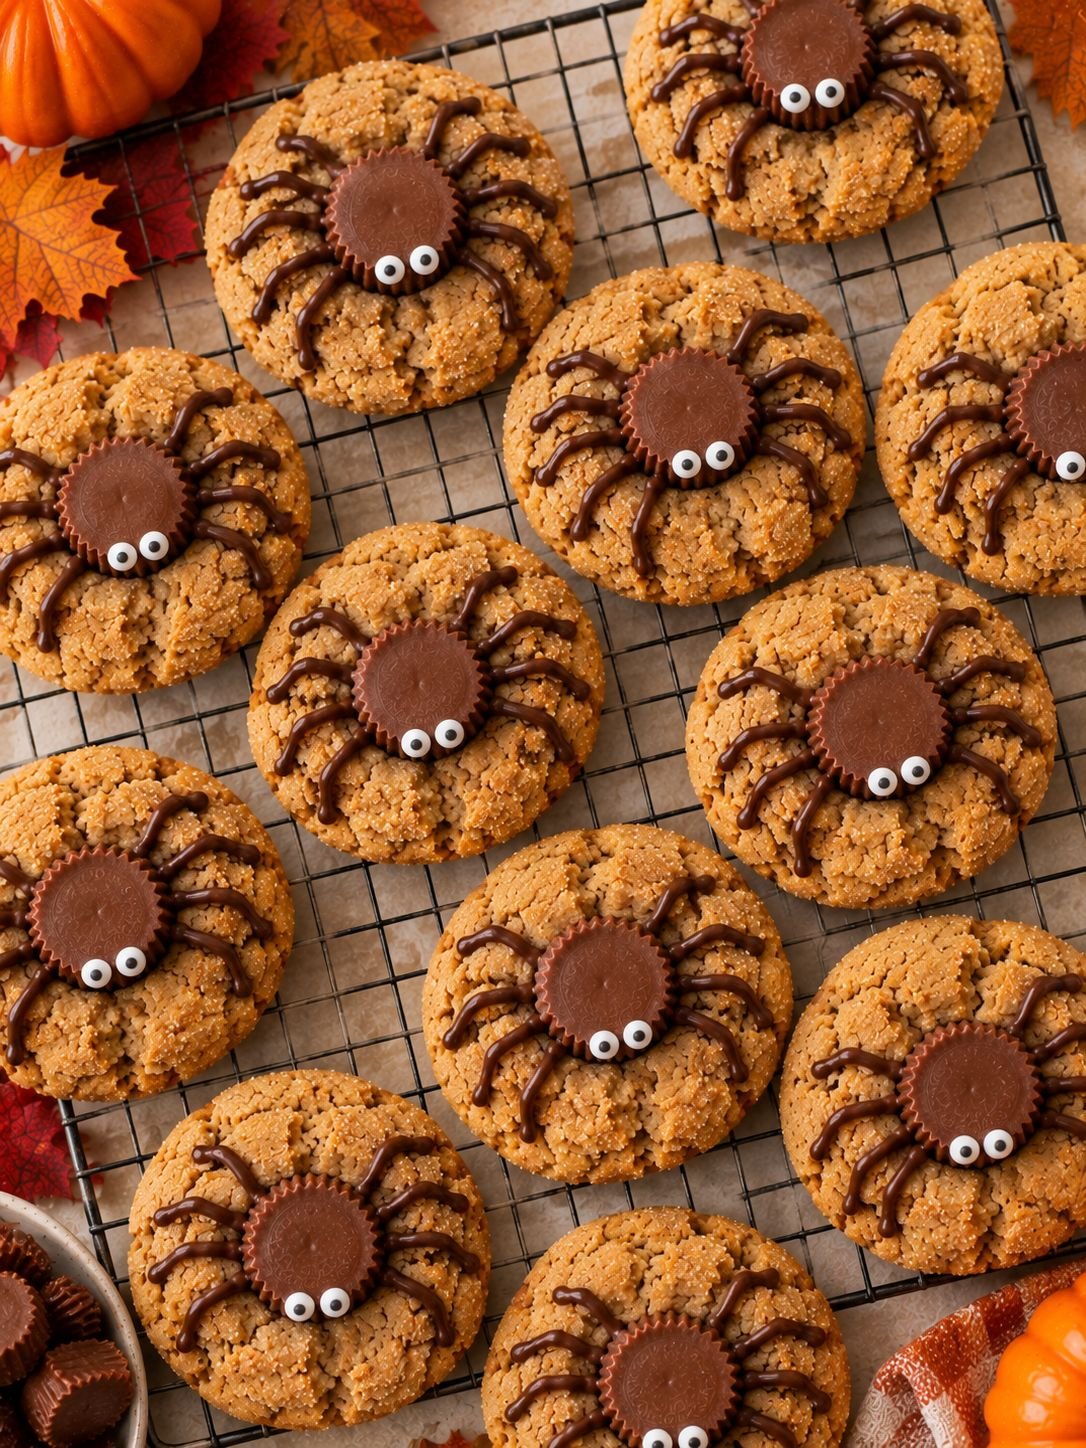
These are the cookies my kitchen smells like every October. Soft, sugar-rolled peanut butter cookies with a mini peanut butter cup pressed into the center, then decorated with melted chocolate legs and candy eyes to turn each one into a slightly goofy, not-actually-scary spider.
They’re a spin on the classic peanut butter blossom, just with a peanut butter cup swapped in for the chocolate kiss and a few minutes of decorating that turns a familiar cookie into something genuinely fun.
The cookie itself is soft and chewy with crisp sugared edges, and the peanut butter cup melts just slightly into the warm center, which is exactly what makes these work.

The part I like most is that the decorating is forgiving. Slightly wobbly legs and crooked eyes actually make them look better, not worse, which makes this a great one to do with kids who want to help without you worrying about the results.
I’ve made these for class parties, neighborhood trick-or-treat gatherings, and a few times just because it was October and I felt like it. They’ve never once come back home with leftovers, and every single time at least one person has asked how I got the legs to look like that, which is always funny given it’s just melted chocolate in a sandwich bag.
Why You’ll Love These Peanut Butter Spider Cookies
They look impressive but are genuinely easy. The spider effect comes entirely from piped chocolate legs and stick-on candy eyes, no piping skill or steady hand required.
They’re a twist on a recipe you already know. If you’ve made peanut butter blossoms before, you already know most of this recipe.
They’re perfect for making with kids. Decorating is the fun part, and imperfect results genuinely look better here.
They travel and store well. These hold up nicely for a class party, a Halloween gathering, or a bake sale without falling apart in transit.
Choosing Your Peanut Butter
The peanut butter you use has a real effect on how these cookies bake and hold their shape.
Creamy, shelf-stable peanut butter (recommended). This is what gives you the most reliable results, a dough that holds together well and bakes into a soft, chewy cookie with clean edges.
Natural peanut butter. The separated oil in natural peanut butter makes the dough looser and greasier, which often leads to cookies that spread too much and turn flat. If it’s all you have, stir it extremely well and consider chilling the dough before baking.
Crunchy peanut butter. This works fine flavor-wise, but the peanut pieces can make it harder to get a smooth, round cookie and can cause small cracks around the edges when you press the peanut butter cup in.
Ingredients
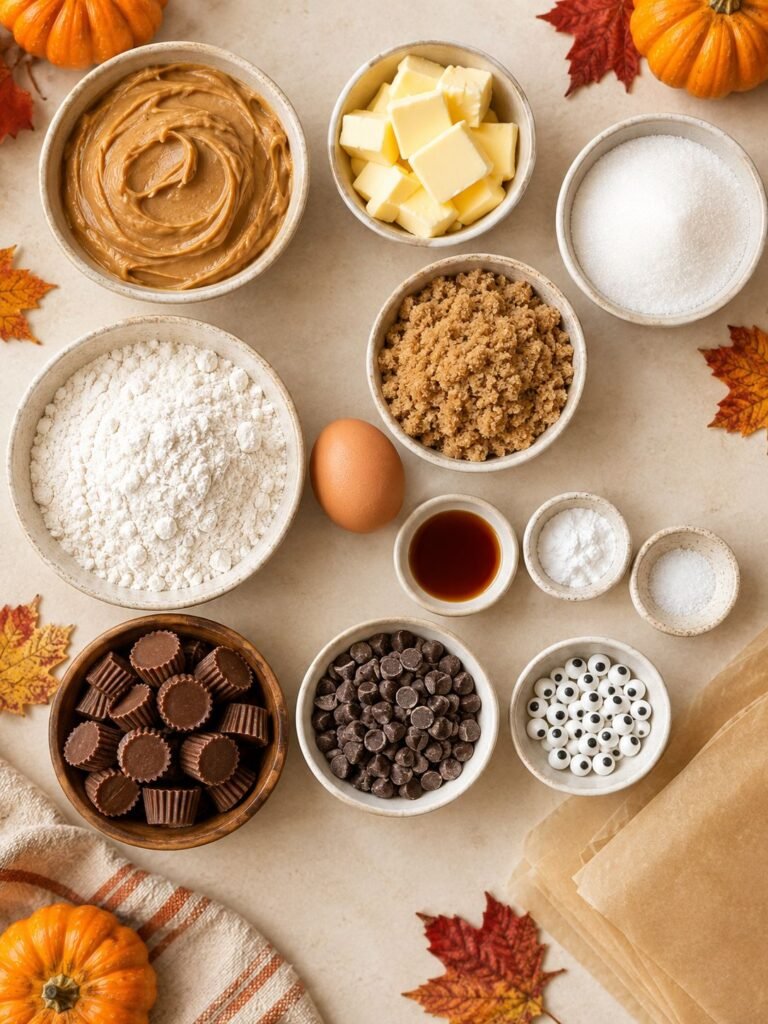
For the Cookies
- 1/2 cup unsalted butter, softened
- 3/4 cup creamy peanut butter
- 1/2 cup granulated sugar
- 1/2 cup brown sugar, packed
- 1 large egg
- 1 teaspoon vanilla extract
- 1 1/2 cups all-purpose flour
- 1 teaspoon baking soda
- 1/2 teaspoon salt
- 1/4 cup granulated sugar, for rolling
For Decorating
- 24 mini peanut butter cups, unwrapped
- 1/2 cup semi-sweet chocolate chips
- 1/2 teaspoon coconut oil, optional, for smoother piping
- 48 candy eyes
A Note About the Peanut Butter Cups
Unwrap all of your peanut butter cups before the cookies go in the oven, not after.
Once the cookies come out, you have a very short window, maybe a minute or two, where they’re soft enough to press a peanut butter cup into without cracking the cookie. Fumbling with wrappers during that window is the fastest way to end up with cookies that have already firmed up too much.
I also like to keep the peanut butter cups in the fridge until right before using them. A cold peanut butter cup holds its shape better when pressed into a hot cookie, while a room-temperature one can slump and lose its distinct edges almost immediately.
If You Need to Substitute
No mini peanut butter cups? A chocolate kiss works as a substitute and turns these back into a more traditional blossom shape, though the spider body will be more pointed than round. Chocolate-covered caramel cups or mini Rolos also work if you want something a bit different.
Out of candy eyes? Two small dots of white icing with a dot of black gel piped on top works in a pinch, though it’s noticeably more fiddly than just sticking on pre-made eyes. Mini white chocolate chips placed flat side up with a dot of melted dark chocolate also do the job.
No brown sugar on hand? Use all granulated sugar. The cookies will be slightly less chewy and a touch less caramel-y in flavor, but they’ll still bake up fine.
Don’t have coconut oil for the chocolate? A tiny bit of neutral vegetable oil or shortening does the same job of thinning the melted chocolate for smoother piping.
Need a dairy-free version? Use a plant-based butter and dairy-free chocolate chips, and look for a dairy-free peanut butter cup, several brands make them now, especially around Halloween.
Equipment You’ll Need
- A stand mixer or hand mixer
- Baking sheets
- Parchment paper or a silicone baking mat
- A small piping bag or a zip-top bag with the corner snipped
- A small microwave-safe bowl, for melting chocolate
- A cooling rack
How to Make Peanut Butter Spider Cookies
Step 1: Cream the Butter, Peanut Butter, and Sugars
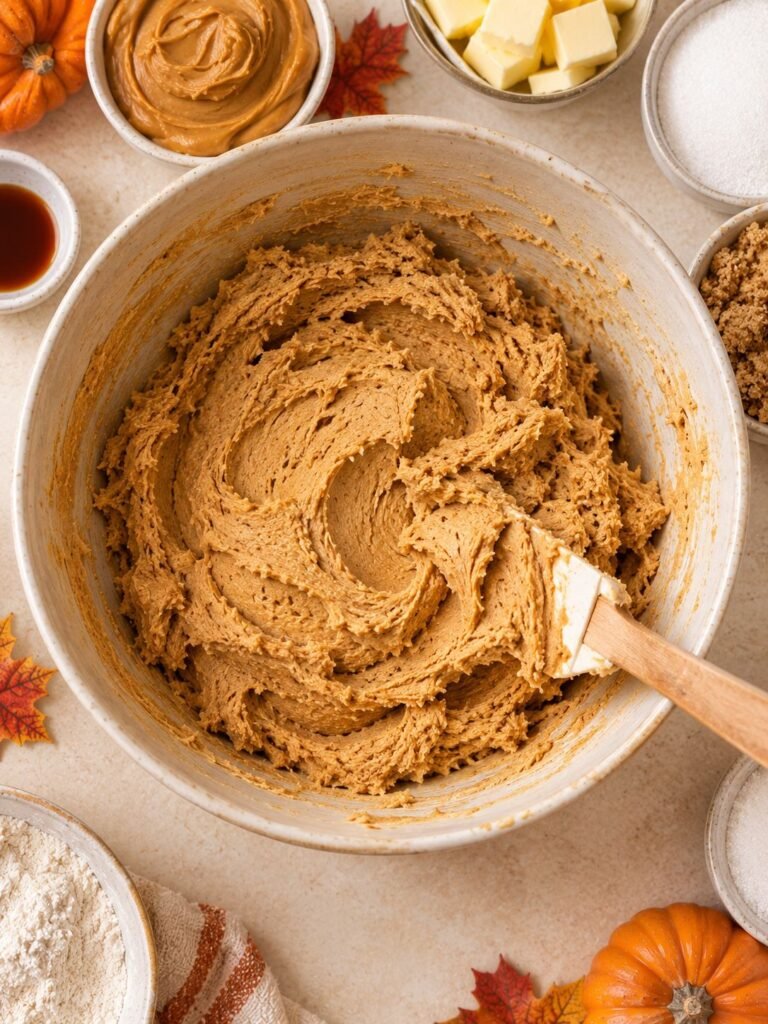
In a large bowl, beat together the softened butter, peanut butter, granulated sugar, and brown sugar until light and fluffy, about 2 to 3 minutes.
Take the full time here rather than stopping as soon as everything looks combined. Properly creamed butter and sugar incorporate air into the dough, which is a big part of what gives these cookies their soft, slightly puffy texture instead of a dense one.
Step 2: Add the Egg and Vanilla
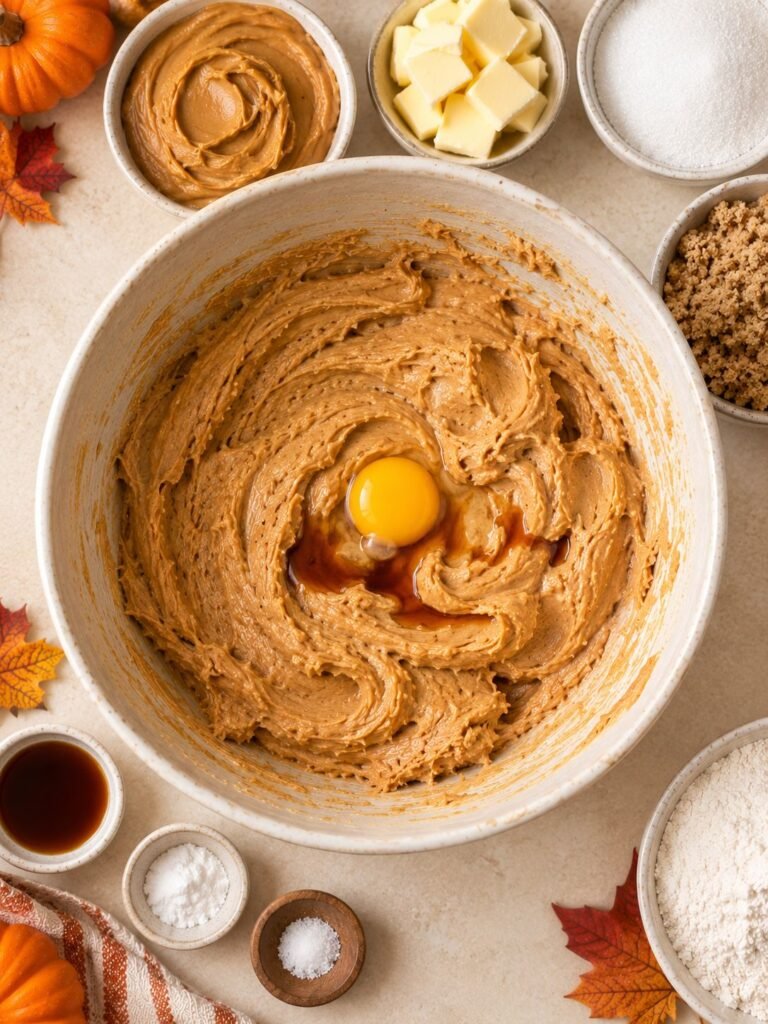
Beat in the egg and vanilla extract until fully combined, scraping down the sides of the bowl once to make sure nothing is left unmixed at the bottom.
Step 3: Mix in the Dry Ingredients
In a separate bowl, whisk together the flour, baking soda, and salt. Add the dry ingredients to the wet mixture and mix on low speed just until combined.
Stop mixing as soon as no dry flour remains visible. Overmixing at this stage develops the gluten in the flour and can make the finished cookies tougher and less tender than they should be.
Step 4: Roll and Coat in Sugar
Scoop the dough into roughly tablespoon-sized portions and roll each into a smooth ball between your palms, then roll each ball in the extra granulated sugar until fully coated.
That sugar coating is what gives these cookies their slightly crackly, sparkly exterior once baked, so don’t skip it or skimp on the coverage.
Step 5: Bake
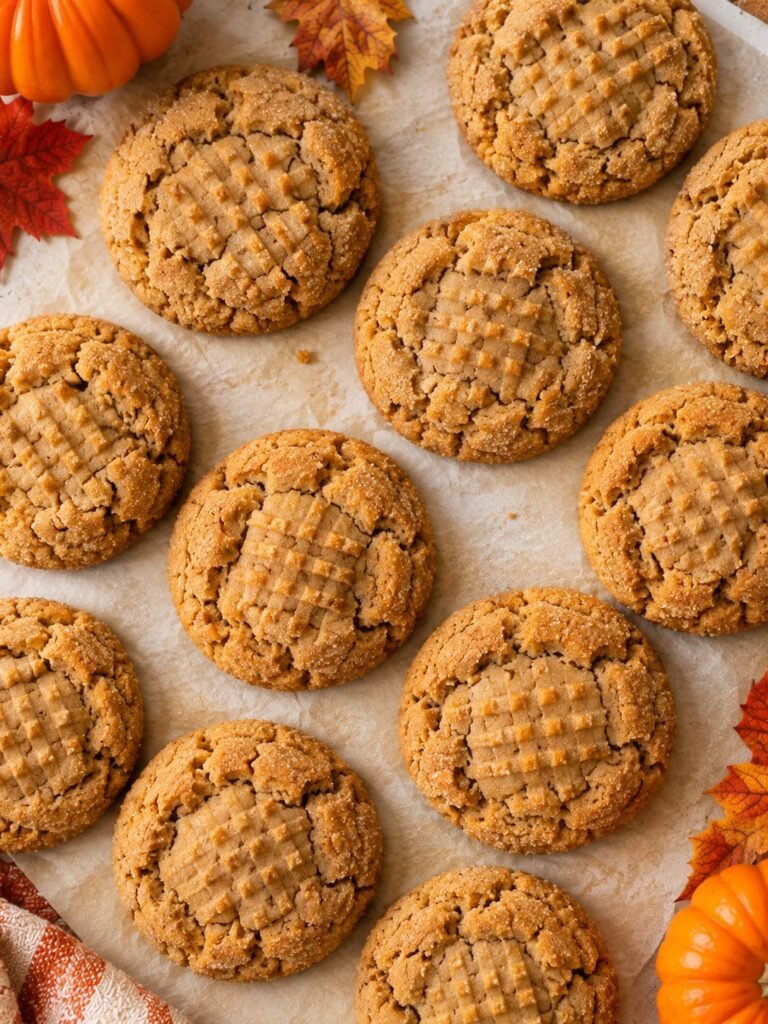
Arrange the dough balls on a parchment-lined baking sheet, spacing them about 2 inches apart, and bake at 350°F for 8 to 10 minutes.
Pull them when the edges are just set and the centers still look slightly underdone and puffy. They’ll continue cooking on the hot pan for another minute or two, and this is what keeps them soft rather than crisp all the way through.
Step 6: Press in the Peanut Butter Cups
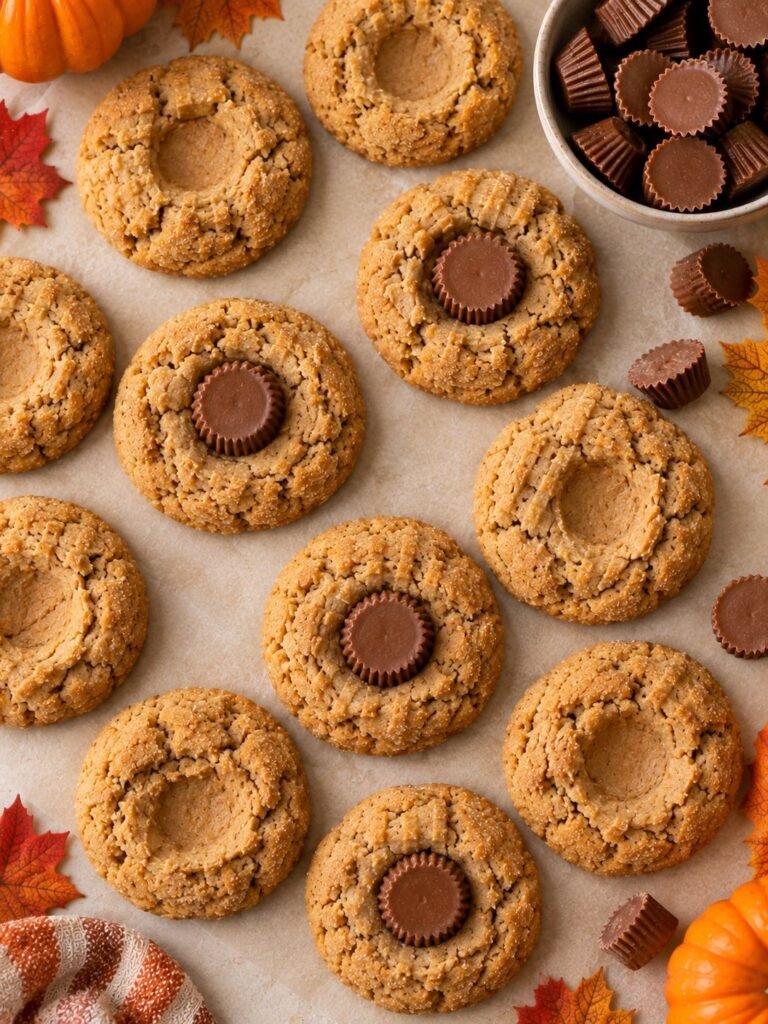
As soon as the cookies come out of the oven, press one mini peanut butter cup firmly into the center of each cookie.
Press with steady, even pressure rather than pushing quickly, which can crack the still-soft cookie around the edges. The cookie will puff up slightly around the base of the cup, which is exactly the look you want, it forms the spider’s body sitting in the center.
Step 7: Cool Completely
Let the cookies rest on the baking sheet for about 5 minutes before transferring them to a cooling rack to cool completely.
Don’t rush to the decorating stage here. The peanut butter cups need to firm back up before you start piping, and warm chocolate legs piped onto a warm cookie will just run and lose their shape.
Step 8: Melt the Chocolate
Combine the chocolate chips and coconut oil, if using, in a small microwave-safe bowl. Microwave in 20-second bursts, stirring well between each, until fully melted and smooth.
The coconut oil isn’t strictly necessary, but it thins the chocolate slightly, which makes it flow more smoothly through a small piping tip and gives you cleaner, thinner legs.
Step 9: Pipe the Legs
Transfer the melted chocolate to a piping bag or a zip-top bag with a very small corner snipped off.
Pipe four legs on each side of the peanut butter cup, starting at the base of the cup and curving outward onto the cookie. Slightly uneven legs look more natural and spider-like than perfectly matched ones, so don’t stress about symmetry here.
Step 10: Add the Candy Eyes
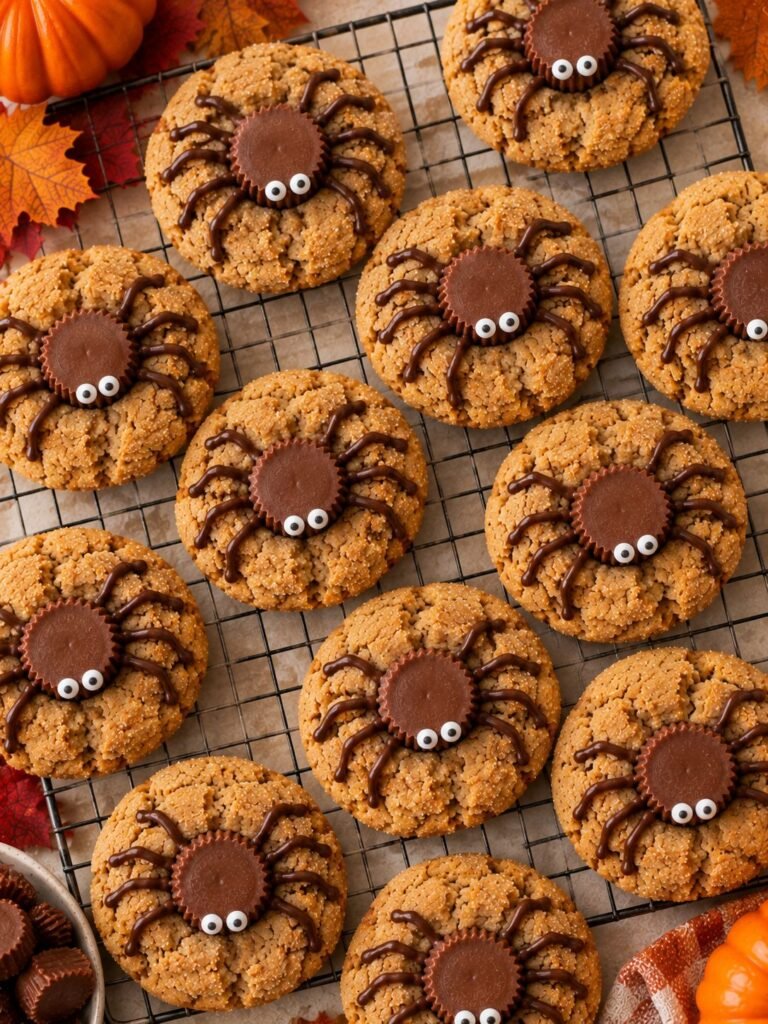
Working quickly while the chocolate is still soft, place two candy eyes onto the front of each peanut butter cup, pressing gently so they stick.
If the chocolate has already set before you get to the eyes, just add a tiny dot of fresh melted chocolate to the back of each eye and use it as glue.
Step 11: Let the Chocolate Set
Let the decorated cookies sit at room temperature for about 20 to 30 minutes, until the chocolate legs are fully firm to the touch, before stacking or storing them.
Tips for the Best Peanut Butter Spider Cookies
- Unwrap the peanut butter cups before baking. The window for pressing them into hot cookies is short, and fumbling with wrappers wastes it.
- Keep the peanut butter cups cold until use. Cold cups hold their shape much better against a hot cookie.
- Don’t overbake. Pull the cookies when the centers still look slightly underdone, they’ll finish setting on the pan.
- Snip a very small hole in your piping bag. A tiny opening gives you thin, spider-like legs. A large one gives you thick, blobby ones.
- Add the candy eyes while the chocolate is still wet. They stick far more reliably than trying to glue them on after the fact.
Mistakes I’ve Made So You Don’t Have To
Waiting too long to press in the peanut butter cups. By the time I got to the last few cookies on the tray, they’d already firmed up, and pressing the cups in cracked them straight down the middle. Now I work fast, one tray at a time.
Using room-temperature peanut butter cups. They slumped almost instantly against the hot cookies and lost all their distinct cup shape. Chilling them first made a noticeable difference.
Snipping too large a hole in my piping bag. The legs came out thick and clumsy instead of thin and leggy. Starting with a smaller hole and widening it if needed is the safer approach.
Decorating before the cookies fully cooled. The chocolate legs melted and ran down the sides of the cookie instead of holding their shape. Full cooling is genuinely worth the wait.
Troubleshooting
My cookies cracked when I pressed in the peanut butter cups. This usually means either the cookies cooled too much before pressing, or too much force was used. Work quickly right out of the oven and press with steady, even pressure.
My chocolate legs won’t hold their shape. This typically means the cookies were still warm, or the melted chocolate was too thin. Let the cookies cool fully, and if the chocolate seems runny, let it cool for a minute or two before piping.
My cookies spread too much and turned flat. This is often a natural peanut butter issue, or dough that was too warm. Try chilling the dough for 30 minutes before baking.
My candy eyes keep falling off. They need wet chocolate to adhere properly. If the legs have already set, add a small dot of fresh melted chocolate to the back of each eye first.
My chocolate seized and turned grainy while melting. This usually means it got too hot, or a drop of water got into the bowl. Melt in short bursts, stir often, and make sure your bowl and spatula are completely dry.
Making These With Kids
This is one of the better baking projects to do with kids, mostly because the decorating stage genuinely can’t be ruined.
Good jobs for younger kids: rolling the dough balls in sugar, unwrapping the peanut butter cups ahead of time, and placing the candy eyes. All three are low-stakes, hands-on, and don’t involve heat or sharp tools.
Good jobs for older kids: piping the chocolate legs. A zip-top bag with a small snipped corner is much more forgiving than a proper piping bag, and uneven legs genuinely look better on a spider than perfectly symmetrical ones.
What to handle yourself: pressing the peanut butter cups into the hot cookies straight out of the oven. The cookies are genuinely hot at that stage, and the window is short enough that it’s worth doing quickly yourself rather than coaching someone through it.
One thing that helps a lot: set up a decorating station with the cooled cookies, a bowl of candy eyes, and the piping bag all laid out before you call anyone over. Melted chocolate starts setting fairly quickly, so having everything ready beforehand keeps the whole thing from turning stressful.
How to Get the Cleanest-Looking Spider Legs
The legs are what actually sell the spider effect, and a few small adjustments make a noticeable difference in how they turn out.
Start with a smaller hole than you think you need. You can always widen it, but you can’t make it smaller once it’s snipped. A hole roughly the width of a pencil tip gives you thin, leggy lines.
Pipe from the base of the cup outward. Starting at the peanut butter cup and drawing the line outward onto the cookie gives you a natural taper, thicker where the leg meets the body and thinner at the tip, which looks much more spider-like than a uniform line.
Add a slight bend to each leg. A small curve or angle partway along the line reads as a joint and looks far more convincing than a perfectly straight line.
Let the chocolate cool slightly before piping. Chocolate straight out of the microwave is very thin and tends to spread on contact. Waiting a minute or two lets it thicken just enough to hold a defined line.
Make-Ahead and Party Prep
These are a genuinely good option for making ahead of a Halloween party or class event.
Dough ahead: the cookie dough can be made up to 2 days in advance and stored covered in the fridge. Let it sit at room temperature for about 15 minutes before rolling, since cold dough is harder to shape into smooth balls.
Baked, undecorated ahead: bake the cookies with the peanut butter cups pressed in, cool completely, and store in an airtight container for a day before decorating. This splits the work across two days without affecting the final result.
Fully decorated ahead: these hold up well for 2 to 3 days once fully decorated, so you can finish them entirely a couple days before an event.
How to Store Leftovers
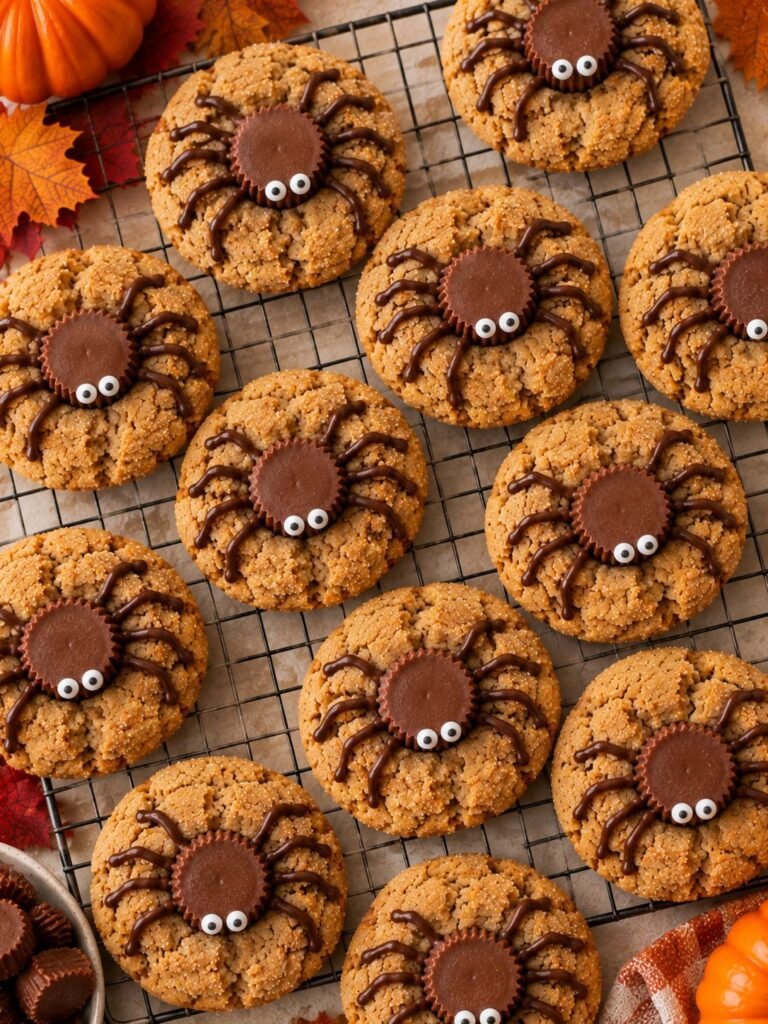
Store in an airtight container at room temperature for up to 5 days.
Layer parchment paper between the cookies if you’re stacking them, since the chocolate legs can stick to the bottom of the cookie above and break off when separated. Avoid refrigerating them if possible, since the cold can cause condensation on the chocolate and dull its appearance.
Can I Freeze These?
Yes, though I’d freeze them undecorated for the best results.
Freezing the dough: roll the dough into balls, freeze on a tray until solid, then transfer to a freezer bag for up to 3 months. Bake straight from frozen, adding an extra minute or two to the bake time.
Freezing baked cookies: freeze the baked cookies with the peanut butter cups pressed in but before decorating, for up to 2 months. Thaw completely at room temperature, then decorate fresh.
I wouldn’t recommend freezing fully decorated cookies, since the candy eyes and piped chocolate can develop condensation and lose their clean look during thawing.
Easy Variations
Dark Chocolate Version. Use dark chocolate peanut butter cups and dark chocolate chips for the legs, for a less sweet, richer flavor.
White Chocolate Spiders. Pipe the legs in melted white chocolate and use a white chocolate peanut butter cup for a ghostly, pale spider.
Extra Spooky Version. Add a small piped chocolate web on the parchment beside each cookie, or use colored candy melts for brightly colored legs.
Nut-Free-ish Version. Swap the peanut butter for sunflower seed butter and use a nut-free chocolate cup, though note the flavor and texture will be noticeably different.
Scaling This Recipe
This recipe doubles cleanly for a larger crowd.
To double: simply multiply every ingredient and bake in batches rather than crowding multiple trays into the oven at once, since overcrowding leads to uneven baking. Just remember to double your peanut butter cups and candy eyes too, running out of eyes halfway through decorating is a genuinely annoying way to end a baking session.
To halve: cut every ingredient in half. The egg is the tricky part here, beat one egg lightly and use about half of it by volume for the most accurate result.
How to Transport These Without Breaking the Legs
The piped chocolate legs are the most fragile part of these cookies, and they’re exactly what breaks first if you toss a container in a bag and hope for the best.
Make sure the chocolate is completely set before packing, at least 30 minutes at room temperature, and longer if your kitchen is warm. A leg that’s even slightly soft will smear against anything it touches.
Pack the cookies in a single layer if you possibly can, in a wide, shallow container rather than a tall one. If you have to stack them, put a sheet of parchment between each layer and don’t go more than two layers deep, since the weight of cookies above can snap legs on the ones below.
For longer trips, or a warm car, a cooler bag with an ice pack, not touching the cookies directly, keeps the chocolate firm without causing condensation on the cookies themselves.
Dietary Adaptations
Dairy-free: use a plant-based butter, dairy-free chocolate chips, and a dairy-free peanut butter cup. Several brands make these, especially seasonally, so it’s worth checking the Halloween candy aisle.
Egg-free: replace the egg with a flax egg, one tablespoon ground flaxseed mixed with three tablespoons water, left to sit for 5 minutes. The cookies will be slightly denser but still work well.
Gluten-free: swap the all-purpose flour for a 1:1 gluten-free baking blend that contains xanthan gum. Chill the dough for 30 minutes before rolling, since gluten-free doughs often spread more.
Nut-free: this is the hardest adaptation, since peanut butter is central to both the cookie and the topping. Sunflower seed butter plus a nut-free chocolate cup is the closest option, though the flavor is noticeably different and the cookies may turn slightly green from a natural reaction between sunflower seed butter and baking soda, harmless, but worth knowing about in advance.
Frequently Asked Questions
Can I use regular-sized peanut butter cups instead of mini? You can, but they’ll overwhelm the cookie and are much heavier, which can cause them to sink or crack the cookie. Mini cups are really the right proportion here.
Where do I find candy eyes? Most grocery stores carry them in the baking aisle near sprinkles and decorating supplies, especially in the weeks leading up to Halloween.
Do I have to chill the dough? Not usually, unless you’re using natural peanut butter or your kitchen is particularly warm. If your cookies are spreading too much, chilling for 30 minutes helps.
Can I make these without a piping bag? Yes, a zip-top bag with a tiny corner snipped off works just as well, and honestly it’s what I use most of the time.
How many cookies does this make? About 24 cookies, depending on how large you scoop your dough balls.
Halloween Peanut Butter Spider Cookies
Ingredients
Method
- Cream the butter, peanut butter, granulated sugar, and brown sugar until light and fluffy, 2 to 3 minutes.
- Beat in the egg and vanilla until fully combined.
- Whisk together the flour, baking soda, and salt, then mix into the wet ingredients just until combined.
- Roll the dough into tablespoon-sized balls and coat each in granulated sugar.
- Bake at 350°F for 8 to 10 minutes, until the edges are just set.
- Immediately press a mini peanut butter cup into the center of each hot cookie.
- Cool on the pan for 5 minutes, then transfer to a rack to cool completely.
- Melt the chocolate chips with coconut oil in 20-second microwave bursts until smooth.
- Pipe four chocolate legs on each side of the peanut butter cup.
- Press two candy eyes onto the front of each cup while the chocolate is still wet.
- Let set at room temperature for 20 to 30 minutes before storing.
Notes
- Unwrap the peanut butter cups before the cookies go in the oven, the pressing window is short.
- Keep the peanut butter cups cold so they hold their shape against the hot cookies.
- Pull the cookies when the centers still look slightly underdone for a soft texture.
- Snip a very small hole in the piping bag for thin, spider-like legs.
- Add the candy eyes while the chocolate is still wet so they stick properly.
- Layer parchment between cookies when storing so the chocolate legs don’t break off.
More Recipes
- Keto Oatmeal Cream Pies
- Keto Peanut Butter Chocolate Fat Bombs
- Keto Chocolate Mousse
- Vegan Jam Tartlets
Final Thoughts
These are the kind of cookies that make a Halloween table feel a little more special without demanding much extra effort from you. The cookie base is a classic for a reason, and the spider decorating takes maybe fifteen extra minutes for a result that looks like it took a lot longer.
If you make these, I’d love to know whether you went with classic milk chocolate peanut butter cups or tried the dark chocolate version instead.
